
Photography Tips: Let’s Talk Gear & Lens Choices for Amazing Senior Portraits
Hey there! I’m here to answer all your photography questions—trust me, I’ve asked every single one of them myself! It might seem like common sense to some, but no matter how long you’ve been shooting, there’s always something new to learn. So today, I’m just gonna share a few photography tips and ramble about lenses. Stick with me!
How Lens Choice Changes the Whole Look
A few of my favorite looks—all created with different lenses, lighting, and perspectives. The gear matters, but so does knowing when (and how) to use it.

What Lens Do You Use?
Oh boy, here we go. The most common question I get from both hobbyists and fellow photographers: “What lens do you use?” The answer is simple, but putting it into practice? That’s a whole different story. Here’s a peek at what’s in my camera bag:
- Canon R5
- Canon 70-200mm 2.8L
- Canon 24mm 1.4L
- Canon 85mm 1.4L
- Canon 24-70mm 2.8L
Clear as mud, right? Yeah, I used to get just as frustrated when I’d ask pros the same question, and they’d reply with, “Well, what are you trying to do?” Uhh, take pictures like you! Meet the photographer behind the camera—and see why seniors (and their moms) love working with me.
Let’s Talk Bokeh & Compression—Using Your Lens to Shape the Story
In both of these nighttime images, I used the same settings—a 200mm focal length and an aperture of f/4—and still got two totally different looks. That’s the magic of bokeh and compression!
Let’s talk about this location for a minute. Believe it or not, these photos were taken in a busy parking lot with city buildings in the background. Can you tell? Nope—and that’s 100% on purpose. This is where understanding your lens makes all the difference!
By shooting at 200mm, I’m able to compress the background, pulling those city lights forward and making them appear much closer to Emma. It’s not just about aperture—it’s about compression, and that comes from using a long focal length. So while I shot both of these at f/4, it’s the compression from the 200mm lens that gives you that beautiful, blurred background that looks totally clean and intentional—even in the middle of a crowded lot.
In the first image, everything is working together for a classic portrait. Emma is fully in focus, and the blurry city lights in the background? That’s the bokeh, created by the long focal length (200mm) and aperture that helps separate her from the background. The longer lens compresses the scene—pulling those glowing lights closer behind her and giving that dreamy, glowing effect without distracting from her.

Now check out the second shot. Same lens. Same aperture. But I had Emma hold out her graduation charm toward the camera. This changed the focal point to the charm itself. The result?
✨ The charm is tack sharp,
✨ Emma is softly out of focus,
✨ and the city lights are still blurred and glowing, just like before.

This is a great example of how you don’t always need to shoot at f/1.4 or f/1.8 to get that creamy background. By understanding focal length, distance, and where you focus, you can create all kinds of creative and visually interesting senior portraits—even at f/4!
I used a variety of lenses to create this gorgeous senior photo gallery of Emma!
Wide Angle Lenses—When You Need to Capture the Whole Vibe
On the flip side, sometimes you need a wider view. For that, I pull out my 24mm lens. This lens allows me to capture everything—whether it’s the entire landscape, a city scene, or the big moments like a gymnast jumping or a football player throwing a pass. It lets me get up close while still keeping everything in the frame.
When I’m using a 24mm wide-angle lens, I’m usually either way up high or down low—there’s not a lot of in-between. For this cap toss shot, I’m laying on the ground about 2 feet behind her, but thanks to the 28mm lens, I could still fit the full scene, catch the motion, and grab that dreamy sunburst. Wide angle = big impact, even from up close!

Addy’s senior portrait session is another great example of how I get variety by using different lenses.
Lens Decisions: What’s Right for You?
So, let’s circle back to the original question: “What lens do I use?” The answer really depends on what I’m shooting and the look I want to create.
Wide Angle (24mm): When You Want to Capture the Whole Scene
- Great for landscapes
- Perfect for tall buildings and cityscapes
- Ideal for showing lots of the surroundings (like a football field or wide-open desert)
- Gives a sense of depth and space
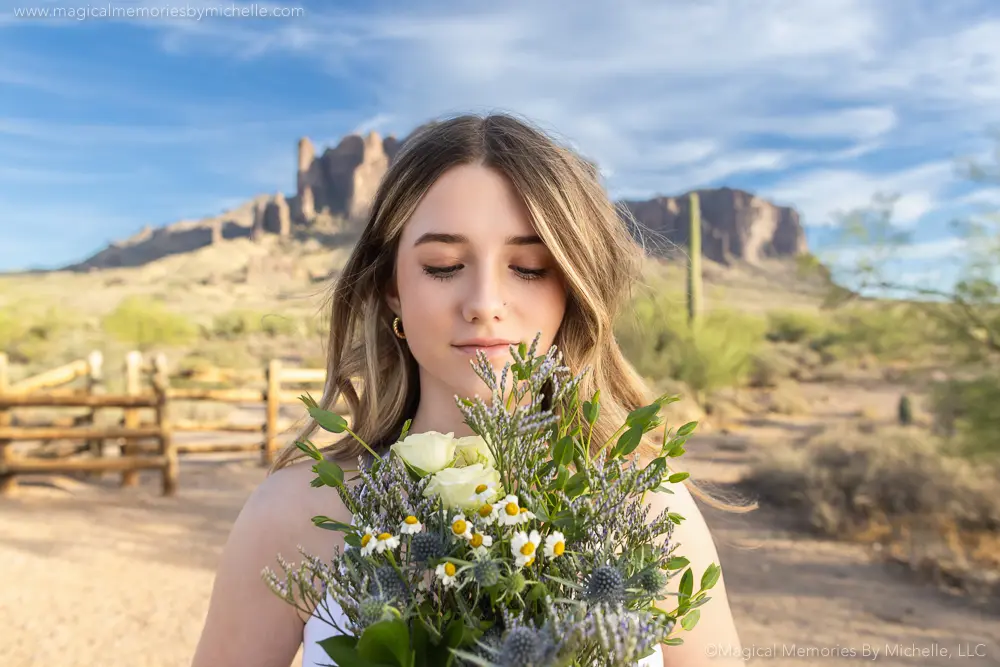
This is exactly why I love using a wide-angle lens for desert sessions. For this shot, I chose my 24mm lens so I could include it all—the Superstition Mountains, the vibrant blue sky, rustic wooden fence, tall cactus, and the soft desert colors in the background. And the best part? I didn’t have to step far away from my senior to make it happen. It’s the perfect example of how a wide-angle lens helps you tell the full story of your location and give the image a strong, natural sense of place.
Long Lens (70-200mm): When You Want That Gorgeous Blurry Background
- Perfect for isolating your subject from their surroundings
- Blurs out busy backgrounds
- Ideal for headshots and close-ups without distractions
- Creates that soft, creamy background compression
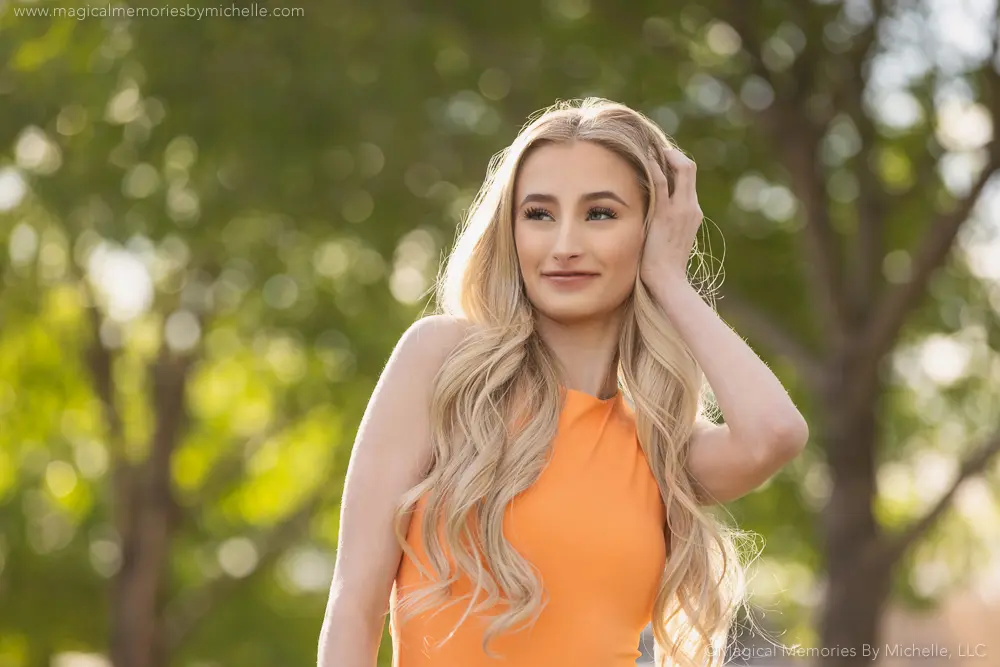
Emma’s image was shot with my 70-200mm at f/2.8, this is exactly why I love long lenses for portraits. The background is full of trees but because the lens compresses the scene and turns all that busy green into soft, creamy bokeh. It keeps the focus where it should be—right to Emma.
Still Figuring Out Senior Portrait Photography?
You’re not alone! Whether you’re new to portraits or just looking to up your game, I’m always happy to help. Got questions about gear, lighting, or how to get that perfect blurry background? Shoot me a message—I love helping fellow creatives grow and feel confident behind the camera!
And if you want to see how I use different lenses in real sessions, check out the blog or peek at my senior portrait galleries for more inspiration!
Keep the Ideas Coming…
Want even more inspo for senior pictures? Follow along on Pinterest, Instagram, and Facebook—I’m always posting the latest looks, posing ideas, favorite location, and real client sessions to help you plan the senior pictures of your dreams!
Got a few more tabs open? Same! So if you’re on a roll, check these out next:
→ What to Wear for Senior Pictures
→ Ideas for Sweet 16 Photo Shoot
→ Ideas for Phoenix Senior Pictures


14 Responses
love this post. I’ll be saving this for later as well. Thank you
You’re welcome! I tried to write it from the perspective that would have helped me when I was learning.
Awesome blog! I’m a Canon gal myself. Can’t live without my Sigma 50mm though 😉
Oh yes, there are tons of amazing lenses out there! I’m looking into a Sigma Art myself, just not sure which one I “need” yet! LOL!
Your work is gorgeous! I love that you took the time to explain different lens choices when photographing a session!
Thanks Susan! I hope it helps!
Nice writing, helpful information.
Thanks!
Love these tips! Very good explanation of how to get that creamy bokeh!
I remember being so frustrated by this so I’m really hoping it helps explain it in another way!
This is a great article, so full of awesome information. Thanks for sharing!
You’re welcome!
Wonderful examples! Lovely warm vibe I get from the way the piece is written too. Friendly tone.
I’m a hobbyist photographer/videographer who has recently gone from prime lenses to zoom lenses and this advice is invaluable. I was falling into the “shoot wide open with ND filter” trap thinking that was the only way to get convincing bokeh but you just proved me wrong Michelle.
What I also really like is seeing someone other than me embrace lens flares, too, and use them to add interest to already great looking shots. This is why I love vintage manual lenses and have several – the flares, the vignetting, the colour fringing. Modern photography lenses are great but I love the artifacts of the older ones, pincushioning and all, leaving 200mm shots uncorrected etc. I think more people should embrace that for a natural, rawer look rather than retouching everything because it looks great.
Gary, you made my morning with your comments! I’m so glad you found this helpful. It just didn’t click with me when I first started and seemed like it took forever, but now I love it. Using one lens is just, well, boring! If you learn to use multiple lenses and when to use them for a desired effect, your portfolio becomes so much better! Hope you stop by again soon! I’d love to see your work!